QuickBooks (Reckon Accounts Premier)
Upgrade
When
you install a new version of QuickBooks (Reckon Accounts Premier) you will need
to make a few changes with Synergy to ensure the sync will take place.
Step
1: Backup Synergy
 NOTE you will
need to do this on the server.
NOTE you will
need to do this on the server.
- Login
to Synergy on the server.
- Select
File > Database > Database backup.
- Select
Quick backup.
- Confirm
the backup name and location.
- Finish.
Step
2: Upgrade and Backup QuickBooks (Reckon Accounts Premier)
NOTE follow the
QuickBooks (Reckon Accounts Premier)
upgrade instructions.
- Backup
your QuickBooks (Reckon Accounts Premier)
data file as per the QuickBooks (Reckon Accounts Premier) instructions.
- Upgrade
QuickBooks (Reckon Accounts Premier)
as per the QuickBooks (Reckon Accounts Premier) instructions.
- If
a new QuickBooks (Reckon Accounts Premier)
data file is created, make a note of the name and location.
- Backup
your upgraded QuickBooks (Reckon Accounts Premier) data file as per the QuickBooks (Reckon Accounts Premier)
instructions.
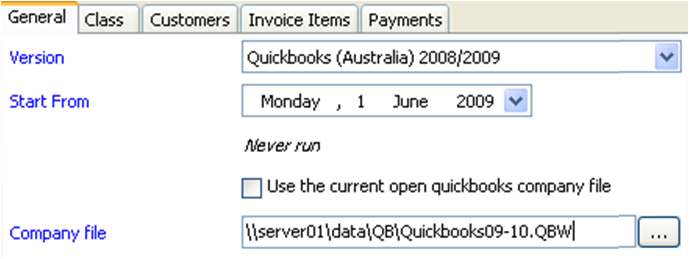
Step
3: Change the location of your QuickBooks (Reckon Accounts Premier) company file
NOTE if you have ’use the current open
QuickBooks (Reckon Accounts Premier)
company file’ selected in the Connect settings window - you won’t
need to complete this step.
- Login
to Synergy on the computer that will run Connect.
- Select
Connect > QuickBooks (Reckon Accounts Premier)Connect.
- Select
Settings.
- At
Company File, browse to the location of and select the upgraded QuickBooks (Reckon Accounts Premier)
data file. Select Open.
- Save
the Connect settings.
Step
4: Process Invoices
and Payments using Connect
- Open
Synergy on the computer that will run Connect.
- Select
Connect > QuickBooks (Reckon Accounts Premier).
- Select
Run.
Want to learn more?
Looking for more help? Try reviewing the following topics:  View Topics
©
2019 Total Synergy Pty Ltd
Open topic with navigation