Create the Synergy
database
Step 1: Launch the application
If the Welcome screen doesn’t open automatically,
you can go to All Programs | Synergy Practice Management
and select the relevant product.
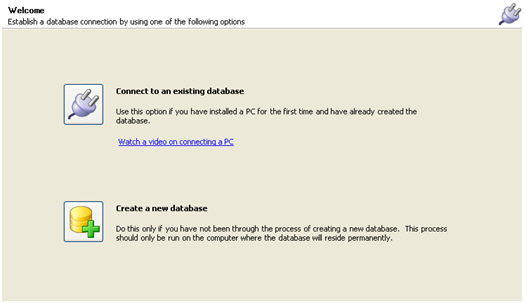
Step 2: Get Connected
If a connection has not yet been established the only
option available will be Get Connected.
Step 3: Create a new database
When you select Create a new database you will work
through a series of steps to successfully create the database. Some features though require additional configuration,
so please read through these instructions carefully.
Click
Create a new database.
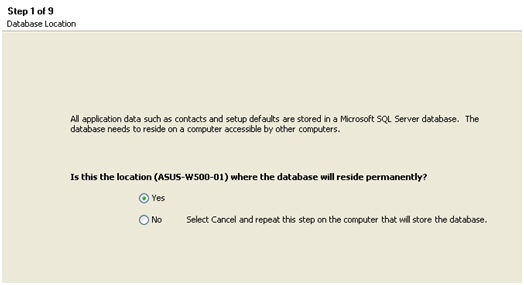
Step 4: Database Location
Select Yes
Only one database is required to be created in a centralised
location - all other PCs will "connect" to this computer and
database. They will enter data that will "write back"
to this computer and the database. All other PCs that will us Synergy,
require access to this computer.
Click Next.
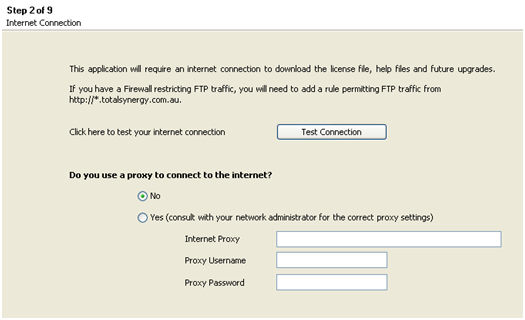
Step 5: Internet
Connection
 Firewall settings
There may also be a failed connection test if you use
a firewall. If you have a Firewall restricting FTP traffic, you
will need to add a rule permitting FTP traffic from http://*.totalsynergy.com.au.
 Please discuss with your
I.T personnel if you have any issues.
Please discuss with your
I.T personnel if you have any issues.
Click Next.
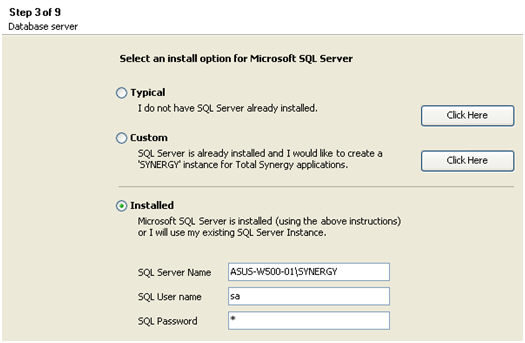
Step 6: Database server
Skip the following step
 if you've already worked through the SQL installation instructions. You
will need to enter the SQL Instance credentials (server name, user name
and password) to validate the install. Proceed
to Enter License Details
if you've already worked through the SQL installation instructions. You
will need to enter the SQL Instance credentials (server name, user name
and password) to validate the install. Proceed
to Enter License Details
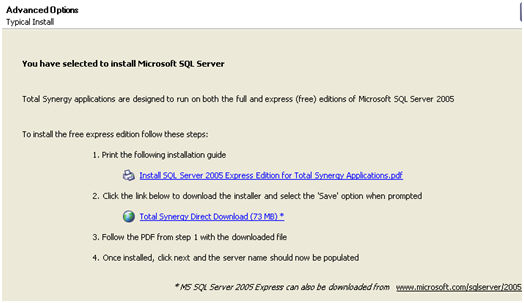
Step 7: Print the instructions
and download SQL Express
It’s important you follow the instructions in
the PDF thoroughly.
- Then when you’re ready select
Total Synergy Direct Download. A file will commence
downloading.
- If prompted select Save.
Select Next.
Step 8: Follow the instructions
for installing SQL Server 2005 Express
Select Next.
Step 9: Check the database server settings
Once you’ve installed SQL
Server Express 2008R2 or 2012, the SQL Server details should
be filled in automatically.
Complete the following steps:
- Check the SQL Server name is correct and make a note of this.
- Type in the password you would have entered during the SQL
Server installation.
Refer below for solutions of possible issues that may occur
here
Click Next.
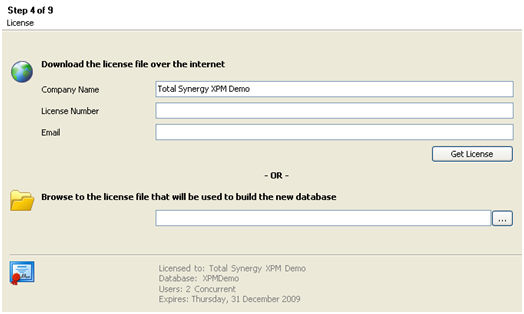
Step 10: Enter license details
Download
- Xpress clients
- Enter your company name, license number and email address.
These details must be exactly as per the email
issued to you.
- Select
Get License. Your license details will appear at the end of the screen.
If your license details don’t display - check the details
entered are correct or check your proxy
settings.
Browse - Synergy clients
- Select
Browse.
- Locate
the license file sent to you by email.
- Select
Open. Your license details will
appear at the end of the screen.
Click Next.
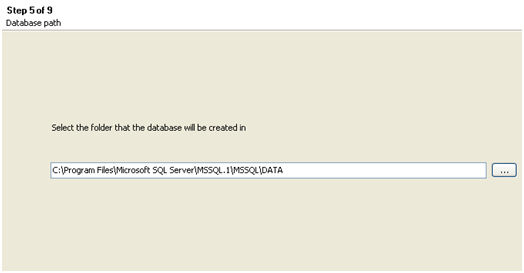
Step 11: Database path
You have the ability to nominate a directory where the physical
database will be created and will reside permanently.
Complete the following steps:
- Create a new directory that will store the database.
- Click Browse to change the default location.
- Select OK.
Click Next.
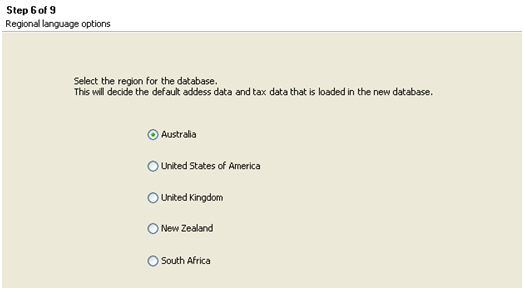
Step 12: Select your country region
The country will detect which region the database should be
created, based on your Control Panel Regional Settings.
Click Next.
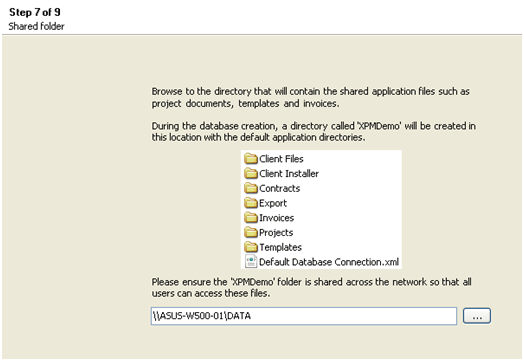
Step 13: Specify your application directory
location
The system will create a directory in a shared location. All documents can be saved automatically to this location and
all document templates will be stored in this location.
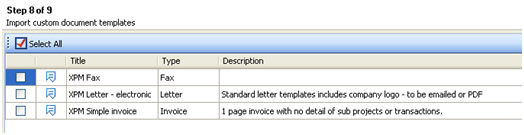
Step 14: Select templates
Sample document templates can be installed automatically when
your database is created. The
templates can be modified once installed.
Click Next.
Step 15: Click Finish
The database will be created.
Once the Database creation is complete, your Total Synergy Application is now ready to use.
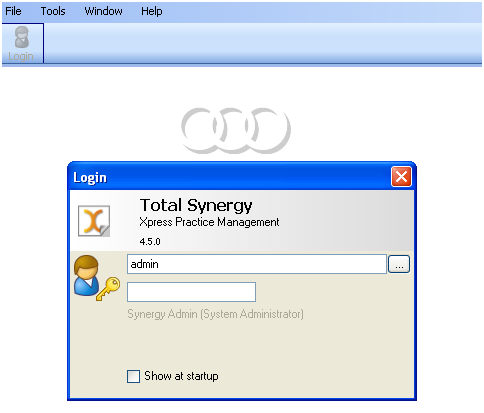
Step 16: Login
Within a new database a 'dummy' user is added to enable
initial access to the database. This user should
be deleted once other users have been created. Ensure the first user to
be created is a System Administrator.
- Select the Login button.
- Select the Admin operator from the list. The
password is a.
Issues with the SQL
connection
Want to learn more?
Looking for more help? Try reviewing the following topics: View Topics
©
2019 Total Synergy Pty Ltd
Open topic with navigation